Showing posts with label Craft. Show all posts

Thursday, January 31, 2013

DIY Book Cover with Stencil

DIY Cover with Stencil

Just completed this…

It’s quite easy. Read on.

Printed stencil design

The design was drawn on the computer and printed on overhead transparencies (see next photo)

Ink jet transparencies

Cutting the stencil

Cutting the stencil. This is a laborious process so do take your time. I cut this in a few sittings, getting up in between to do something else. That works for me because when I get tired, I make mistakes.

Stencil design with acrylics

Stencilling onto the book cover. I used white acrylics paint. Again, slow is good, and keep lifting the stencil to see if you have got enough paint on the design. I used the (almost) dry brush method (as the name suggests, no water and very little paint each time I dabbed my brush onto the surface), but a foam roller will also work well.

DIY Cover with stencil

I made another 2 bits of stencil for the cup cakes above. All done!

Saturday, January 26, 2013

DIY Concertina Book–Part 2

Accordian pages

In Part 1, I made the internal pages of the book. In this section, I will show you some work-in-progress pictures of the cover, and of course the final product.

By the way, I have left the completed pages under a pile of heavy books (you can use phone books) to flatten, while I went shopping.

Bookbinding Cloth

I went to Melbourne Etching Supplies, and they have a number nice bookbinding cloth to choose from. I settled for a green/purplish one which cost below $20 per meter, including GST (a meter of material is enough for many books, since it is very wide – about 4 feet).

DIY book binding

Leaving the cover material aside, back home, I used a matt board (acid free) and cut out the front and back covers – slightly bigger than the paper (about 0.5 cm on all sides). I measured the thickness of the internal pages and then cut the spine. (If you find that the size of the boards are too dissimilar of crooked, you can use a sandpaper to make corrections.)

DIY book bindingDIY book binding

Next place the boards on the cloth and cut out a piece, leaving about 2.5 cm around the outside (see photo on the left). Then draw the cover on the inside leaving about 0.1 cm space on the left and right of the spine (this will allow the book cover to fold nicely), as a guide for the next stage (gluing the boards to the cloth)

DIY book binding

The lined boards should look something like the above photo. Glue the boards to the cover material. Ensure the glue covers the entire contact surfaces, not just the edges of the boards. (During this stage, have lots of clean white papers handy and clean along the way if any glue goes astray!)

DIY book binding

Turn to the other side. Smooth down to sure that there is no air bubble trapped. At this stage, I placed a few big books to weigh down the cover for a few hours till the glue dries. This will prevent the boards from curling.
DIY book binding

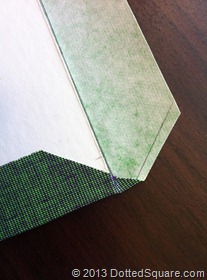
Then cut all 4 corners diagonally, leaving about 0.2 cm space from the corner of the board. Fold the 4 edges and glue.

DIY book binding

The inside of your book cover should look something like in the above photo. Next we will tidy up the inside of the cover, as well as stick the pages to the book.

DIY book binding

I paste over the inside of the back cover, then score the fold lines of the spine, to help the cover fold neatly.

IMG_2654

Then stick page one to the inside front cover and we are done. Here I have placed a stamp on the spine.

DIY book bindingIMG_2658

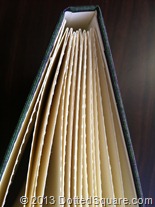
The finished book – imperfect but I love that about DIY projects.

Would you have a go?

Sunday, January 20, 2013

DIY Concertina Book–Part 1

I am in the midst of making a DIY concertina book. So far, I have completed the internal pages, and in Part 2, I will stick the cover to complete the book.

The book is 60(h) x 210(w) mm, but when I cut my papers, I add another 20 mm to the width. I score and fold the 20 mm section, then stick it to the next page (which also has the 20mm section). So we keep joining the pages until we have a long piece of folder paper.

Making a DIY Concertina book

My completed pages look like this. You can see some of the 20mm sections below.

Accordian fold

Instead of sticking the pages together, you can make the pages using a long piece of paper. This is a simpler option – see the video below.

For my book, I am using a deckled edge for one side of the book:

Deckled blade

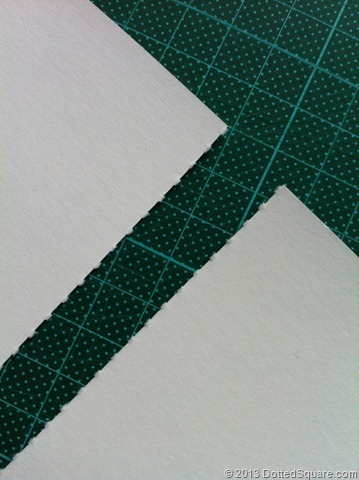
After cutting with the circulate blade above, I fold and separate the 2 pieces.

Deckled edge

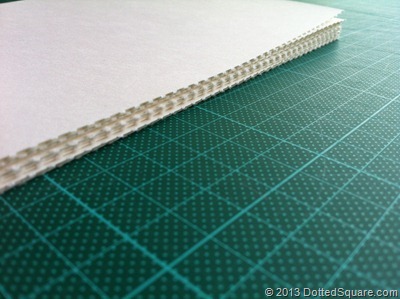
This is what my stack of pages look like (see below). I like deckled edges, and it is also a way to cover up imperfections.

Deckled edge

Part 2 to come, after I buy the materials required to make the cover.

Thursday, January 17, 2013

DIY book cover design

Handdrawn Cover for Sketchbook

Here’s another DIY book design.

The steps involved are quite similar to what I did with the text design on cover, except that instead of planning the composition on the computer, I made an initial sketch of the design on a piece of paper. Then I drew the design lightly onto the cover with a soft pencil, then went over with a pigment pen. I have used acrylics and collage for this piece too.

Hope you will have a go at designing your own book covers. You can customise the cover by including your name. It will make a great sketchbook.

Happy creating.

Sunday, January 13, 2013

DIY framing

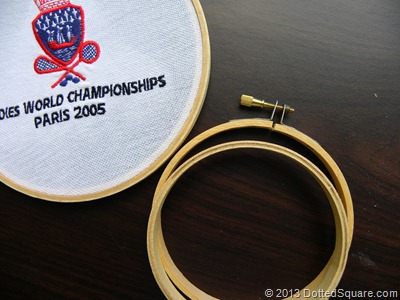
This is a quick, easy and inexpensive way of framing your images on fabric. In fact I found 2 embroidery hoops in a charity shop for a few dollars, one of which I have now used to frame this emblem for a friend.

The emblem was on a T-shirt, which - after nearly 8 years – has shrunk. It was a competition she had played in, so I managed to save the emblem so that she can now put it on her wall as a memento. 

DSCN7513DSCN7511

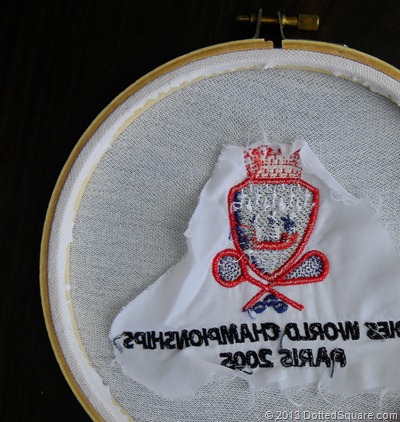
To frame the image, I placed the hoop and adjusted the fabric until I was happy with the position of the image (my image looks a little bit crooked here!). Then I cut the fabric off around the back of the hoop, using a serrated scissors, leaving an excess of about 1 cm.

Framing with embroidery hoops

I glued the excess fabric onto the frame so that the back looks tidy.

Easy isn’t it?

Thursday, January 10, 2013

DIY book cover design with text

DIY book cover design

This is a simple way to decorate a plain cover. You can personalise the design for a great gift. Here are some simple steps.

Plain book

Find a book with a plain cover. Decide on a theme for your design and list words that relates to the theme.

Text layout

For this design, I laid out the text on my computer to work out the composition and fonts (if you haven’t got access to an application to do that, just use pen or pencil to sketch it out on a rough paper).

DIY Book Cover Design

Sketch the design lightly with pencil on the cover, and paint some words white.

White acrylics paint

I used acrylics paint. When the paint is dry, outline all the text with pen.
Note: wait for the paint to dry or your pen/s will be wrecked.

Black pigment ink pens

I like to use a variety of pens with different thickness and shades. You may decide to use only a single pen or use coloured pens.

DIY Book Cover Design

This is roughly where we are up to. There are a lot of gaps to fill in.

Text layout

Back to the computer – make a list of other words related to your theme in smaller font sizes, and print.

DIY book cover design

Cut and lay your words on the design, then glue them permanently.

DIY book cover design

I added some red and it was done. You may want to add other colours.

DIY book cover design

I put DottedSquare.com’s logo on the back of the book. Don’t forget to sign your name.

Monday, January 7, 2013

Easy DIY necklace

DIY necklace

This is probably the easiest necklace to make. The components are:

1. The ribbon which was purchased ready with clasp (how good is that!)
2. A jump ring and
3. A pendant.

The tool required is a pair of pliers (2 will make it easier) to twist the jump ring to attach the pendant and ribbon. This simple DIY job takes minutes. The completed necklace which I am looking forward to wearing is shown below.

DIY Japanese girl necklace

It can easily be made more dressy by adding some bling (some sparkly beads perhaps). All components can be purchased easily (having said that, I will not be able to tell you where this Japanese lady pendant can be found, but you will be able to find other pendants). One of my favourite stores is an online store, Over the rainbow.